
Oxva Xlim Pro 2 Vape Kit Setup Tips for a Better Experience
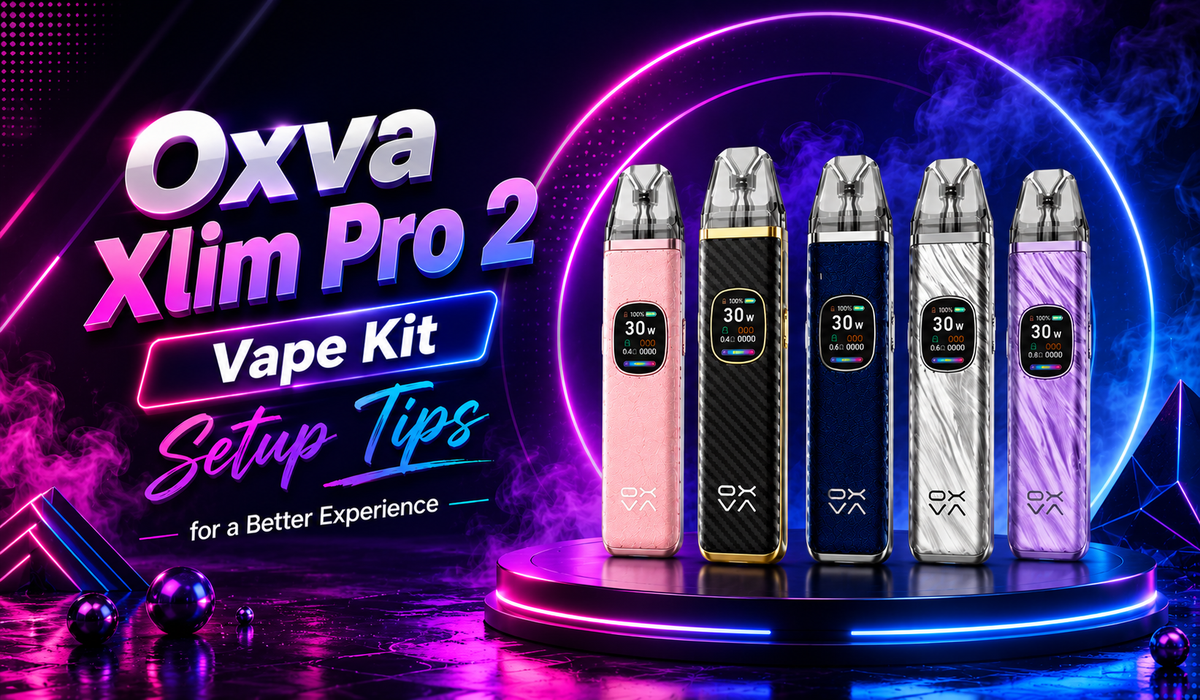
Choosing the right vape device is only the beginning of enjoying a satisfying vaping experience. Whether you're transitioning from prefilled vapes or upgrading from an older refillable pod system, learning how to use the XLIM Pro 2 correctly will help you achieve consistent performance from the very first puff. The way you set up your device, select the appropriate pod, adjust the airflow, and use the correct e-liquid all have a direct impact on flavour, vapour production, and the lifespan of your coil.
The Oxva Xlim Pro 2 Vape Kit has quickly become one of the most popular refillable pod systems among new and experienced vapers alike. Its compact design, intelligent features, adjustable settings, and compatibility with different pod resistances make it suitable for a wide range of vaping preferences.
Tips for a Better Experience
1. Prime the Pod Before Your First Puff
After filling a new pod, leave it for 5–10 minutes before vaping. This allows the cotton inside the coil to absorb the e-liquid fully, preventing dry or burnt hits and helping the pod last longer.
2. Use the Recommended Wattage
Always vape within the wattage range recommended for your pod resistance. Using too much power can burn the coil, while using too little may reduce flavour and vapour production. The smart mode is a good starting point for most users.
3. Adjust the Airflow to Match Your Style
Use the airflow slider to customise your draw. A tighter airflow delivers a stronger throat hit that's ideal for mouth-to-lung vaping, while a more open airflow produces smoother vapour and larger clouds for restricted direct-lung vaping.
4. Keep the Pod Topped Up
Avoid letting the e-liquid level drop too low. Keeping the pod at least one-third full ensures the coil remains saturated, improving flavour and reducing the risk of burnt hits.
5. Clean the Pod Contacts Regularly
Remove the pod every few days and wipe the metal contacts with a dry cotton bud or lint-free cloth. Cleaning away condensation and e-liquid residue helps maintain a strong connection, resulting in consistent flavour and vapour production.
6. Charge the Battery Correctly
Use the supplied USB-C cable and disconnect the device once it reaches a full charge. Avoid exposing the vape to extreme temperatures, as proper charging habits help extend battery life and maintain reliable performance over time.
What Is the Oxva Xlim Pro 2 Vape Kit and Why Is It So Popular?
The OXVA 2 Vape Kit is a refillable pod vape designed to deliver excellent flavour, reliable performance, and simple operation in a compact package. Unlike prefilled devices that are discarded after use, this pod system features a rechargeable battery and refillable pods, making it a more cost-effective and environmentally friendly option. Its lightweight construction makes it convenient to carry throughout the day while still offering enough power to satisfy both light and regular vapers. One of the main reasons for its popularity is its ability to cater to different vaping styles without becoming complicated.
Who Is the Oxva Xlim Pro 2 Designed For?
The XLIM Pro 2 UK is suitable for a broad range of users because it balances simplicity with performance. Beginners often appreciate how easy it is to fill the pod, adjust the airflow, and start vaping without navigating complex settings. Former smokers looking to switch to vaping also benefit from its smooth mouth-to-lung inhale when paired with nicotine salt e-liquids, providing a familiar sensation that closely resembles traditional cigarettes.
What Makes This Pod Kit Different from Other Vape Devices?
The Oxva Xlim Pro 2 stands out because it combines advanced features with a user-friendly design. Many compact pod systems either prioritise simplicity or customisation, but this device successfully delivers both. With support for OXVA Xlim Pods, it offers flexible resistance options while its intelligent power management recommends suitable wattage. The adjustable airflow slider also makes it easy to switch between a tighter mouth-to-lung draw and a looser restricted direct lung inhale.
Key Features at a Glance
- Rechargeable built-in battery
- USB-C fast charging
- Adjustable airflow control
- Automatic draw activation
- Manual firing button
- Smart wattage recommendations
- Refillable leak-resistant pods
- OLED display with battery information
- Multiple compatible pod resistances
- Compact and lightweight design
How Do You Set Up the Oxva Xlim Pro 2 for the First Time?
Setting up the Oxva Xlim Pro 2 correctly is one of the most important steps towards achieving excellent flavour and extending the life of your pods. A properly prepared pod and a fully charged battery provide the best possible start, while choosing suitable Vape Pods UK options can help ensure consistent performance from the very first inhale. Following the recommended setup process also allows the internal cotton within the coil to become fully saturated before use. This helps protect the coil from overheating and significantly reduces the likelihood of damaging a brand-new pod during its first few puffs.
What's Included in the Box?
The contents may vary slightly depending on the retailer or edition, but most Oxva Xlim Pro 2 kits include everything required to begin vaping immediately after adding e-liquid.
- Oxva Xlim Pro 2 device
- Two refillable Xlim pods
- USB-C charging cable
- User manual
- Warranty card
- Lanyard (selected editions)
Before using the device, check that all components are present and inspect the pods for any protective seals that should be removed before filling.
How to Charge the Device Before First Use?
Although the battery arrives partially charged, fully charging it before first use helps maximise performance. Use the USB-C cable with a reliable power source and avoid high-powered laptop chargers. Proper charging habits support better battery life, especially for Pod Vape Kits. Once fully charged, disconnect the cable instead of leaving the device connected unnecessarily. This simple habit supports battery longevity while ensuring the device is ready to provide consistent power throughout the day.
How to Install the Pod Correctly?
Installing the pod correctly ensures reliable electrical contact and helps prevent leaking. Begin by removing any protective stickers or seals from the pod before filling it with your chosen e-liquid. Once filled, allow the pod to stand for approximately five to ten minutes so the coil absorbs enough liquid. This step is important when setting up the XLIM Pro Kit for smooth flavour and consistent performance.
After priming, gently insert the pod into the top of the device until the magnetic connection holds it securely in place. The pod should fit firmly without excessive movement. If the device fails to detect the pod, remove it, wipe the contacts with a clean tissue, and reinsert it carefully.
How to Turn the Oxva Xlim Pro 2 On and Off?
The Oxva Xlim Pro 2 has been designed for convenient daily use, allowing users to switch the device on or off using the firing button while also supporting automatic draw activation. Depending on the firmware version, the device may also include a locking function that prevents accidental wattage adjustments when carried in a pocket or bag.
Even when the controls are locked, many users continue to enjoy the convenience of inhale activation without worrying about accidental button presses. Reading the supplied instruction manual ensures you understand the exact button combinations available on your specific model before making any adjustments.
How Do You Fill the Oxva Xlim Pro 2 Pod Without Leaking?
Filling the pod correctly is one of the easiest ways to prevent leaks and maintain consistent flavour. Although the Oxva Xlim Pro 2 features a well-designed refillable pod with improved leak resistance, incorrect filling techniques can still allow e-liquid to enter the airflow channel or create excess pressure inside the pod. Taking a few extra moments to fill the pod properly helps extend coil life and ensures every puff delivers smooth, clean flavour.
It is also important to use a suitable e-liquid bottle with a narrow nozzle, as this makes filling easier and reduces the chance of spills. After filling, always check that the silicone filling port is completely sealed before inserting the pod back into the device.
Step-by-Step Pod Filling Guide
Start by removing the pod from the device and opening the silicone fill port carefully. Insert the bottle nozzle into the filling hole and slowly add your preferred e-liquid without overfilling the pod. Leaving a small air gap at the top helps prevent pressure from forcing liquid into the airflow chamber. Once filled, close the silicone plug securely and wipe away any excess e-liquid around the pod before reinstalling it.
If you're filling a brand-new pod, always allow enough time for the cotton inside the coil to absorb the liquid fully before taking your first puff. This simple step protects the coil and significantly reduces the risk of dry or burnt hits.
How Long Should You Wait Before Vaping?
After filling a new pod, it is recommended to wait at least five to ten minutes before using the device. During this time, the e-liquid gradually soaks into the cotton surrounding the coil, ensuring it is fully saturated before heat is applied. Vaping immediately after filling may cause the cotton to burn before enough liquid reaches the coil, permanently affecting flavour.
If you are using a thicker e-liquid with a higher VG content, allowing the pod to sit for a few additional minutes can further improve saturation. Patience during this stage often results in better flavour and a longer-lasting pod.
Common Filling Mistakes to Avoid
Most leaking issues are caused by simple filling mistakes rather than defects in the pod itself. Overfilling the pod leaves no room for air pressure to balance, while failing to close the silicone plug completely allows e-liquid to escape during use. Filling too quickly can also create air bubbles that interfere with proper saturation.
Another common mistake is allowing the pod to remain nearly empty for extended periods. Low e-liquid levels increase the chance of dry cotton and inconsistent wicking, which can lead to burnt hits and reduced flavour. Keeping the pod adequately filled not only improves performance but also helps extend coil life.
Which Pod Is Best for the Oxva Xlim Pro 2?
Choosing the correct pod has a significant impact on your vaping experience. Different pod resistances are designed to perform best with specific wattage ranges and e-liquid types, meaning the right combination can noticeably improve flavour, vapour production, and coil longevity. Fortunately, the Oxva Xlim Pro 2 supports several compatible pod options, giving users the flexibility to customise their preferred inhale.
Before selecting a pod, consider how you like to vape. Some users prioritise a tight, cigarette-like draw with higher nicotine strengths, while others prefer a slightly airier inhale that produces warmer vapour and larger clouds.
Understanding Pod Resistance Options
Pod resistance is measured in ohms (Ω) and determines how much power reaches the coil during vaping. Higher-resistance pods generally require lower wattage and produce a cooler, tighter draw that works exceptionally well with nicotine salts. Lower-resistance pods operate at higher wattages and generate warmer vapour with increased cloud production.
Understanding this relationship allows you to select a pod that matches both your vaping style and your preferred e-liquid, resulting in a smoother and more enjoyable experience.
Best Pod for Nic Salt E-Liquid
For users who primarily vape nicotine salts, higher-resistance pods are usually the best choice. These pods provide a tighter mouth-to-lung inhale, making them ideal for former smokers seeking a familiar sensation. They also operate efficiently at lower wattages, conserving battery life while delivering smooth nicotine satisfaction and excellent flavour.
Higher-resistance pods typically consume less e-liquid, making them economical for everyday use while helping the coil remain in good condition for longer.
Best Pod for Freebase E-Liquid
If you prefer freebase e-liquids, lower-resistance pods generally offer better performance. These pods operate at higher power levels, producing warmer vapour and denser clouds while maintaining strong flavour. They are particularly suitable for users who enjoy a more open restricted direct lung inhale rather than a tight cigarette-like draw.
Choosing the correct nicotine strength is equally important when using lower-resistance pods, as the increased vapour production can deliver nicotine more efficiently than expected.
How to Choose the Right Pod for Your Vaping Style
The ideal pod depends on how you prefer to vape rather than simply selecting the lowest or highest resistance available. Mouth-to-lung users generally benefit from higher-resistance pods paired with nicotine salts, while restricted direct lung users often prefer lower-resistance options combined with freebase e-liquids.
Factors such as nicotine strength, desired vapour production, battery efficiency, and flavour preference should all be considered before choosing a pod. Matching these elements correctly creates a balanced vaping experience while helping each pod reach its maximum lifespan.
How Can You Get Better Flavour from the Oxva Xlim Pro 2?
The Oxva Xlim Pro 2 is widely recognised for its excellent flavour production, but achieving consistently rich flavour depends on proper device care and setup. Small adjustments to your vaping habits can noticeably improve flavour while extending the lifespan of your pod.
Many common flavour issues are not caused by faulty hardware but by incorrect wattage, insufficient priming, or poor maintenance. Paying attention to these simple factors helps ensure every puff remains smooth, clean, and satisfying.
Prime the Pod Correctly
Properly priming a new pod is one of the most effective ways to preserve flavour and protect the coil. After filling the pod, allow it to stand for at least five to ten minutes before vaping. This waiting period gives the cotton enough time to absorb the e-liquid completely, preventing dry spots that could burn when heated.
Use the Right Wattage
Running your device within the recommended wattage range allows the coil to heat evenly without becoming excessively hot. Insufficient wattage may produce weak flavour and limited vapour, while excessive power can overheat the cotton and permanently damage the coil.
Keep Your Pod Filled
Allowing the e-liquid level to fall too low increases the risk of exposing parts of the cotton to air. Once dry cotton is heated, it can burn quickly and permanently affect flavour quality. Maintaining at least one-third of the pod filled with e-liquid helps ensure continuous saturation and reliable wicking during every puff.
Clean the Pod Contacts Regularly
Condensation and small amounts of e-liquid can gradually accumulate around the pod connection points, reducing electrical contact between the pod and the device. This buildup may lead to inconsistent firing, weaker flavour, or reduced vapour production.
How Long Does an Oxva Xlim Pro 2 Pod Last?
The lifespan of a pod varies depending on how frequently you vape, the type of e-liquid you use, and how well the device is maintained. Under normal conditions, most users find that a pod provides reliable performance for one to two weeks before flavour begins to decline. However, careful maintenance and sensible vaping habits can often extend its usable life.
Rather than replacing pods on a fixed schedule, it is better to monitor flavour quality and vapour production. These indicators provide a much more accurate measure of when a pod has reached the end of its lifespan.
Average Pod Lifespan
For the average user, a pod generally lasts between seven and fourteen days. Light vapers may find that their pods remain in good condition for even longer, while heavy users who vape throughout the day may need replacements more frequently.
Using sweeter e-liquids often shortens coil life because sweeteners leave residue on the heating element over time. Choosing cleaner e-liquid formulations and following proper maintenance practices can help maximise pod longevity.
Factors That Affect Coil Life
Several factors influence how long a pod continues to perform effectively. High wattage settings generate more heat, which naturally wears the coil more quickly. Frequent chain vaping also places additional stress on the cotton by reducing the time available for fresh e-liquid to soak into the wick.
The type of e-liquid also plays an important role. Very sweet flavours, darker liquids, and thicker formulations tend to leave deposits on the coil faster than lighter, less sweet alternatives. Keeping the pod adequately filled and cleaning the device regularly also contribute to a longer-lasting coil.
Signs You Need a New Pod
A gradual reduction in flavour is usually the first sign that a pod is nearing the end of its lifespan. Vapour production may become weaker, the draw may feel inconsistent, or a slight burnt taste may begin to develop even when sufficient e-liquid remains inside the pod.
Persistent leaking, visible damage to the pod, or repeated gurgling after cleaning are additional indicators that replacement is necessary. Installing a fresh pod restores flavour quality and ensures the device continues to perform efficiently.
Common Oxva Xlim Pro 2 Problems and How to Fix Them
Like any refillable pod system, the Oxva Xlim Pro 2 may occasionally experience minor issues during everyday use. Most problems are easy to diagnose and can usually be resolved without replacing the device. Regular cleaning, proper charging, and using compatible pods help prevent many of these issues before they occur.
If the device suddenly stops performing as expected, avoid assuming it is faulty. In many cases, a simple adjustment or routine maintenance restores normal operation within minutes.
Device Not Turning On
If your device does not power on, begin by checking the battery level. Connect it to the supplied USB-C charger and allow it to charge for several minutes before attempting to switch it on again. A completely discharged battery may require a short charging period before the screen responds.
If charging does not solve the issue, inspect the charging port for dust or debris and ensure the cable is functioning correctly. If the device still fails to power on after charging, consult the manufacturer's troubleshooting guide or contact the retailer for further assistance.
Pod Not Detected
A pod detection issue is often caused by dirty contact points or an incorrectly installed pod. Remove the pod and wipe both the metal contacts on the pod and inside the device using a dry cotton bud or lint-free cloth. Once cleaned, reinsert the pod firmly until it sits securely in place.
If the problem persists, inspect the pod for signs of damage or wear. Replacing the pod usually resolves the issue if the internal coil or connection has failed.
Weak Vapour Production
Weak vapour is commonly caused by low battery power, incorrect wattage settings, or a worn pod. Start by ensuring the battery is adequately charged and that the selected wattage falls within the recommended range for your pod. Low e-liquid levels can also affect vapour production because the coil may not remain fully saturated.
If performance does not improve after adjusting these settings, replacing the pod is often the quickest solution, especially if flavour has also started to decline.
Auto Draw Not Working
The automatic draw sensor may stop responding if condensation or e-liquid has entered the airflow pathway. Removing the pod and cleaning the airflow area with a dry cloth often restores normal operation. Avoid blowing directly into the device, as this may push moisture further inside.
If the firing button still activates the device while auto draw does not, the airflow sensor may require professional inspection. Keeping the airflow channel clean reduces the likelihood of this problem occurring.
Flashing Light Meanings
The indicator light provides useful information about the device's operating status. Different flashing patterns may indicate a low battery, short circuit protection, low resistance, overheating, or charging status. While the exact meaning varies slightly depending on the firmware version, repeated flashing usually signals that the device's built-in safety features have detected an issue requiring attention.
Referring to the user manual helps identify the specific meaning of each flashing pattern and the appropriate corrective action.
Conclusion
The Oxva Xlim Pro 2 Vape Kit combines portability, excellent flavour, adjustable airflow, and intelligent power management in a compact device suitable for both beginners and experienced vapers. By selecting the correct pod, using an appropriate e-liquid, maintaining the recommended wattage, and performing regular cleaning, users can enjoy consistent performance while extending both pod and battery life. Whether you prefer a smooth mouth-to-lung inhale with nicotine salts or a slightly airier restricted direct lung experience using freebase e-liquids, the Oxva Xlim Pro 2 offers the flexibility to suit a wide range of vaping styles. Following the setup tips, maintenance advice, and troubleshooting guidance in this article will help you maximise flavour, minimise common issues, and enjoy a reliable vaping experience every day.
Frequently Asked Questions
How Do I Unlock the Oxva Xlim Pro 2?
Most versions of the device include a button-lock function that prevents accidental adjustments while carrying the vape. The exact button combination depends on the firmware version, so it is advisable to consult the user manual for the correct unlocking procedure.
Can I Use Any Oxva Xlim Pod?
The Oxva Xlim Pro 2 is compatible with supported Xlim pod series designed specifically for the device. Using genuine compatible pods ensures reliable performance, better flavour, and correct power delivery.
Is the Oxva Xlim Pro 2 Good for Beginners?
Yes. Its combination of automatic draw activation, intelligent wattage recommendations, adjustable airflow, and refillable pods makes it an excellent choice for beginners while still offering enough flexibility for experienced users.
How Often Should I Change the Pod?
Most users replace their pod every one to two weeks, although actual lifespan depends on vaping frequency, wattage settings, and the type of e-liquid used. Replace the pod whenever flavour declines noticeably or a persistent burnt taste develops.
What E-Liquid Works Best?
A balanced 50/50 VG/PG e-liquid generally provides the best overall performance. Nicotine salt e-liquids work particularly well with higher-resistance pods, while lower-resistance options perform better with freebase e-liquids.
-
Posted in
Oxva pods, Oxva Xlim Pro 2, pod vape guide, vape maintenance, vape setup tips, Wolf Vapes